I got about 4h in today. Fortunately, Sarah has been off from school so she was around to help me with this step. This was a royal pain. The concept is simple, but the executing is anything but. My advice is the more people the better on this one.
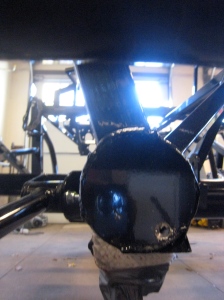
I started by filling the differential with 2qts of 75W-90 gear synthetic gear oil and the 4oz of friction modifier that the plans call for. Easy. Next, we lifted the axle up on the jack, just like the pictures in the manual. This was tricky, as you basically have to balance the thing on there and it very easily tips off. 
The next step involves installing the lower control arms to the chassis. Not surprisingly, given the critical nature of this component and the high tolerances between the parts, it is a tough fit. A lot of rotating and lifting the axle to try to get it to fit. When the axle fell off the jack, which was not a surprise (and it landed on the traction lock bracket and not the rotor fortunately), it was time to bring the hoist into play. After an hour of fighting with it, I decided to approach the problem from reverese. I loosened the bolts holding the traction bracket on the side that was giving me the most trouble (Pass side) and removed the control arm. Then, bolted the arm to the chassis and only then bolted the arm to the axle.  This worked somewhat better. Then, I tightened everything down. My concern through all of this was that the misalignment that I had encountered on the bracket to axle step on the same side was translating itself into problems with this critical step, the ramifications of which I didnt even want to think about…
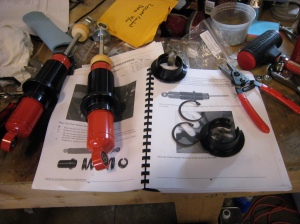
Once the axle was in place, the shocks were assembled. Same process as the front shocks.
Bolting the shocks to the frame would have been easier if the plans were a little more explicit. First, the panhard bar, which is temporarily bolted to the frame needs to be removed in order to install this. Again, it would be nice if this was explained rather than having some moments of panic (like, wtf! did we install this whole axle upside down???). The plans call for a 4″bolt and a slew of shims for the lower shock bolt (shock to traction brackets), but they only give you one spacer and a 3″ bolt. Turns out the 3″ bolt works just fine with just enough thread showing on the other end that I became suspicious that this was what was really intended. Too important not to call the factory and confirm, which they did. 
 Last for the day was the panhard bar. Got started on drilling the hole in the big tube crosspiece of the chassis. Helps to raise the axle with a jack to give you as MUCH upward movement on the bar as possible, so that the hole will give you enough room for the nut on the other end. Slow and steady drilling, but ran out of battery and time to complete the step, so will have to wait until Monday.HAPPY THANKSGIVING!!!!!


Leave a comment