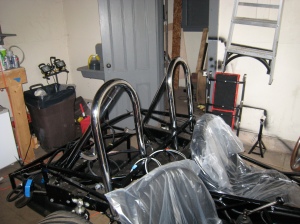
I started with the roll bars. I learned of a cool aftermarket mod from a builder that I met at the school by Tangent Technologies where the need for a visible bolt through the upper part of the rear support roll bar – to hoop is eliminated for a much for cosmetically pleasing result. I ordered a couple of them and was looking forward to installing them. The first step was just to put the roll bars on the frame and see how well they fit, which from what I had been reading, I was pleasintly suprised to see was quite well! I then took them down and followed the Tangent instructions, which involves placing a pre-assembled part into the support tube as well as the hoop. Each assembly has a group of shanks which are held together by a bolt and a threaded rod couple. AS the couple is tightened against the bolt, the shanks puch outward and press against the tube into which they are installed. Through the other end of the couple goes a piece of threaded rod, which then screws into a similar assembly in the mating tube. The hardest part was getting the assembly to pass the 4″ necessary from the opening to sit in the tube properly, for which I used a scrap piece of aluminum angle and some encouragement from a mallet.

Method for torquing the union nut. You have to get the torque up to 30 ft-lb's which is hard to do with a slippery, chromed, tube which you dont want to scratch. I put it into position and using a little bit of side load was able to get it to stay there while I torqued it.
Once this was done, I temporarily installed and drilled the roll bars. They fit together brilliantly, and other than the sweat of pushing the drill against chromed, hardened steel, the drilling process was long but conceptually easy. I then removed the roll bars for final installation later when the body is complete.
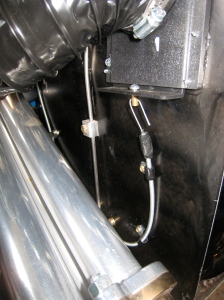
The next item to address was the cable going from the cockpit to the flange on the footbox vent, something that had been on my mental punch list for a while. Cobra Earl’s supplies a very flimsy, cheap push pull cable, which, after installation, was totally inadequate.Maybe as a result of the circuitous route I made it take or the cheapness of the material… either way it is going to have to be replaced or done away with altogether as I did on the passenger side. I need to spend some time thinking about this.
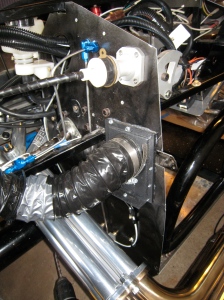
Maybe you can see it, maybe not. It comes out of the big hole with the wires and makes a 270 degree sweeping turn.
I then decided to put the body on. Not sure that this is the right time to do it in retrospect, and I think I may have been a little hasty in this decision. Looking at it now, I wish I had at least installed the wiper motor. I may decided to remove it and address a couple things first. Anyway, I started by installing all of the panels which contact the body, and the weatherstripping and the bulb seal that the plans call for. I observed immediately that the trunk separation panel from Breeze was sitting too proud to make a good transition from the rear cockpit to the trunk area, and will most certainly need some trimming.
So, with that, I summoned my helper (Sarah) and we carefully loaded the body off of the buck and onto the frame. The process was much less eventful than I had thought. There were some areas that clearly interfered with the correct lay of the body; the rear trunk walls extend aft too far and are going to need some trimming. The trunk separation panel as expected was too proud. Also, I am not sure that the side wings on the dash require any modification to get it to sit correctly (like bolting it forward to the frame). I also found that I had to do lot of adjusting to get the body to sit properly fore and aft and side to side. At first, I thought there was a problem with it sitting on the dash properly and the rear cockpit wall at the same time, but it turns out it is not a problem, just very little wiggle room.
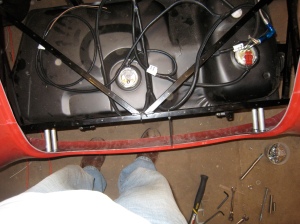
I then did what I was dreading – I dropped the tank so that I could get the rear quick jack bolts in. I had decided at the buikld school to go with the Breeze rear quick jacks instead so that the tank dropping experience would be a one-time affair and I am glad I did. I spent about an hour just trying to get the bolts on the tank back in place; don’t forget, the tank has a little gas in it too, which didnt help the process…






Leave a comment